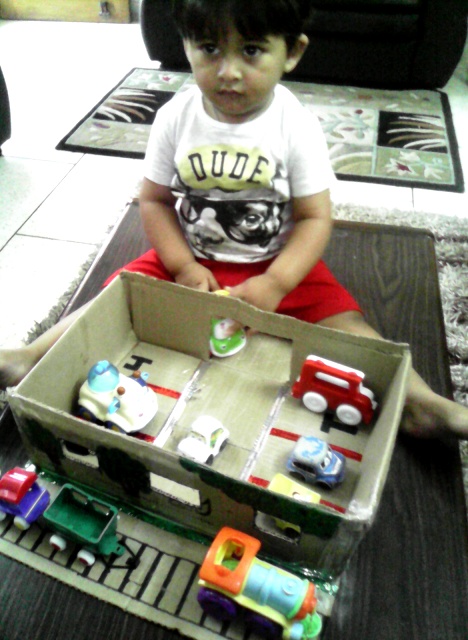
Cardboard Car Park is something I made a long time ago, maybe a year back…. Even the quality of the pics is not too good!! But anyhow, this was the first thing of craft I ever did for my baby, so here it is!

I do a lot of shopping from www.Firstcry.com and www.Amazon.in. And the boxes in which the stuff is packed and delivered, keep piling up. Earlier I used to do away with them. But at that time I had started going through a lot of craft and mommy blogs, so the inspiration lead to this cardboard car parking.
Here is all that you will need:
- A cardboard box
- Scissors
- Cello tape
- Sketch pens
- Colored Tapes
First, you need to think of the needs of the kid – what is the size of cars he has. The door shouldn’t be small – otherwise they will end up breaking it!
Secondly, do away with the roof – as kids need to see and maneuver their cars.
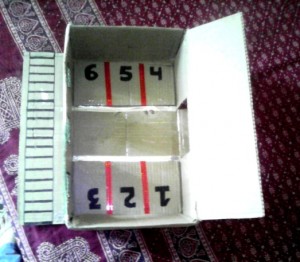
Then you can think of the construction – how many doors to make, windows, slopes, rail track, etc.
Since Ram was just over one, I decided not to add slopes in this one. Also, for his first parking, I wanted it to be easy and hassle free.
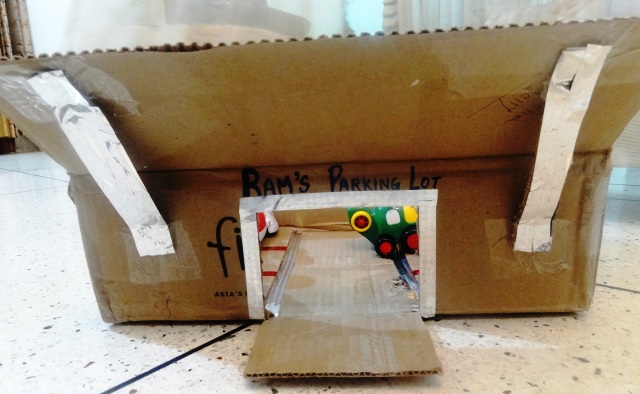
I took the cardboard piece of the roof and cut it into half. With one piece, I made the railway track, by sticking it to the bottom of the parking.
The second piece was used to make the shed on the front side, along with the entrance. We called it “RAM’s PARKING LOT “. (The shed eventually came off as it was a hindrance in the free play.)
Once you are done with the cutting and pasting now is the time for designing. Instead of adding any trees or lights etc, it would be better to draw and color the same.
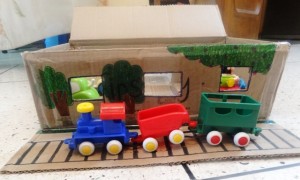
You can mark the parking for cars with numbers and shiny tape. Make trees with fruits and flowers to make it attractive… or whatever you can think of. And your cardboard car park is ready !!
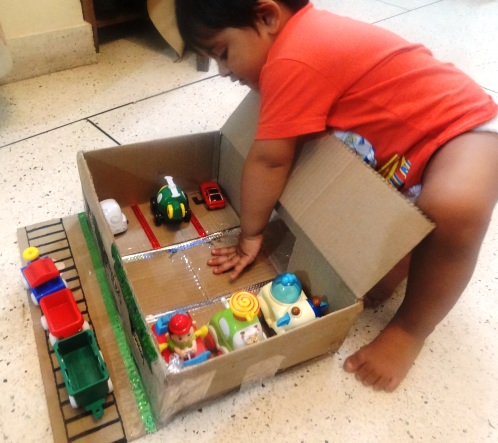
Trust me, my kiddo was stuck to the parking lot for several days. He loved it!!!!
category:crafts, Kids activities
1

very nice… specially with the trees and all!