I love narrating and dramatizing stories for my students. So this time we did “The Thirsty Crow”.
Material arranged for the story:
- Pebbles
- A transparent container with water
- Crow puppet
Setup and Narration of story:
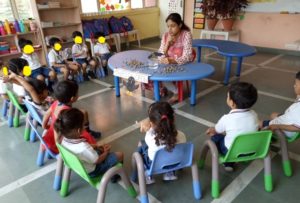
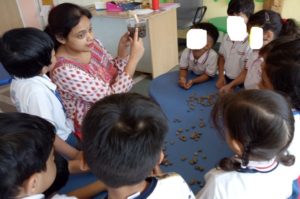
I spread the pebbles on the table and put the transparent pot of water in the middle. Also, I wrote the title of the story on a chart paper and pasted it on the table, along with a sample of the craft which we did after the story.
I put my table in the center and seated all my students around me. Then I started narrating the story, with the crow puppet in my hand.
And also enacted few actions..
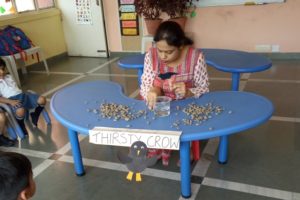
When we came to the point where the crow puts pebbles in the pot, I marked the pot with a permanent marker to show the level of water before the pebbles are put inside. Then, I got the kids to put the pebbles in water.
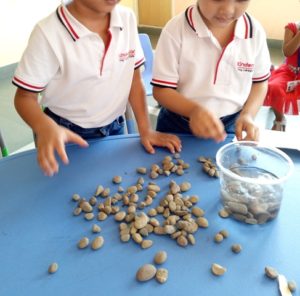
After all the kids had put the pebbles in water, we saw the raised level of water. I again marked this on the pot with the marker, to make the kids understand how the level of water was raised due to the space occupied by pebbles at the bottom of the pot. This ultimately helped the crow to quench his thirst.
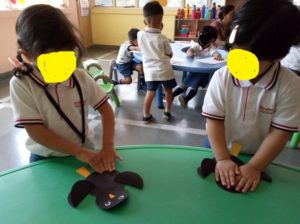
The Thirsty Crow Craft:
The crow craft turned out pretty cute. I cut out all the body parts of the crow with chart paper and the students just had to put it all together with some glue.
Body parts of the crow:
Head – Black chart – Circle
Body – Black chart – Circle
Wings – 2 Black chart circles
Beak – orange chart – triangle
Feet – orange chart
2 Googly eyes
Method:
Put all the pieces together as shown in the images below.
For the wings, just fold the circular piece into half and paste from the bottom so that the wing is half open.
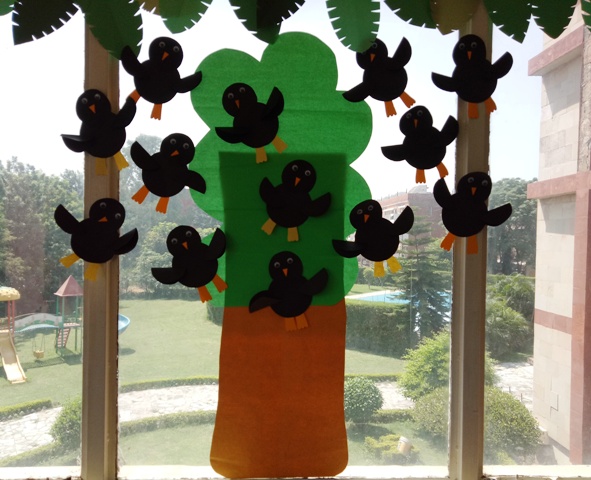
These are all of the thirsty crows:
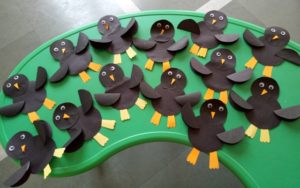
I made a simple tree and pasted it on one of the class windows. Finally, I pasted all the thirsty crows around the tree.

The narration and dramatization of the Thirsty Crow turned out pretty good.. Even after 3 months of the activity, they remember the story and the fun they had !
category:Featured, Kids activities
0
